
Ductless mini splits are one of the most DIY-friendly HVAC upgrades, at least on paper. There's no ductwork to build, the indoor head hangs on a bracket, and the outdoor unit sits on a pad or wall bracket. But a mini split is still a sealed refrigerant system with high-voltage wiring, and some parts of the job are legally restricted or require specialized tools. This guide walks through the full installation process so you know what's involved, which steps a handy homeowner can usually prepare, and which steps belong to a licensed HVAC technician.
Read this first: what DIYers can and can't do
Refrigerant work requires EPA 608 certification. On a standard (non-pre-charged) mini split, the outdoor unit ships with refrigerant sealed inside. Making the refrigerant line connections, pressure testing, pulling a vacuum, opening the service valves and adjusting the charge are refrigerant-handling tasks. Under the Clean Air Act, refrigerant may only be handled by technicians certified under EPA Section 608, and refrigerant can't be legally purchased without certification. For a standard system, plan on having a licensed, EPA 608-certified HVAC technician complete or supervise all refrigerant connections, the vacuum and the charge.
Electrical work must follow local code. Mini splits run on a dedicated circuit, often 208/230V, with a disconnect near the outdoor unit. Wire size, breaker size, the disconnect and grounding must follow the National Electrical Code as adopted in your area, plus any local amendments. Many jurisdictions require a permit and a licensed electrician for new circuits.
Pre-charged "DIY" systems use factory-sealed line sets with quick-connect fittings, so the refrigerant circuit isn't opened during installation. They are designed for homeowner installation when you follow the manufacturer's instructions exactly. The electrical connection still has to meet local code.
Check the warranty. Many manufacturers require installation by a licensed contractor, plus product registration, for full warranty coverage. Read the warranty terms before you start.
Tools and materials
- Mini split indoor and outdoor units, matched per the manufacturer's combination chart
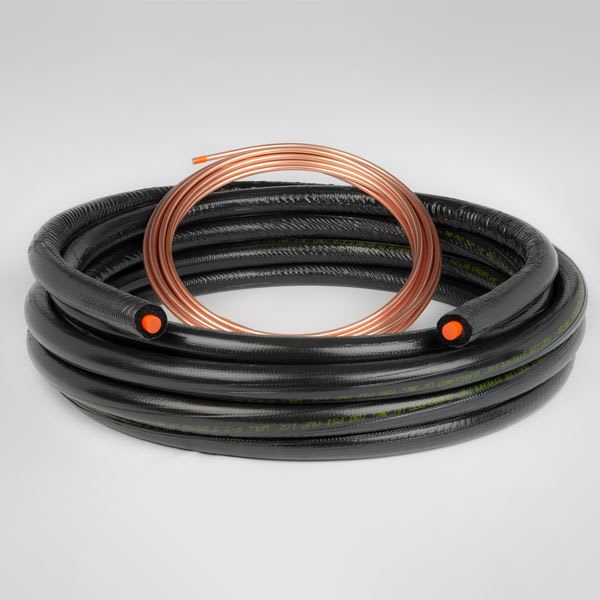
- Refrigerant line set of the correct diameters and length, plus line set cover (optional)
- Communication/power cable between the indoor and outdoor units, as specified by the manufacturer
- Condensate drain hose or tubing, and a condensate pump if gravity drainage isn't possible
- Outdoor mounting pad or wall bracket, and anti-vibration pads
- Hole saw for the wall penetration (often 2-1/2" to 3-1/2", per the manual), level, stud finder, drill
- Exterior-grade sealant or a wall sleeve to seal the penetration
- For the HVAC tech: flaring tool, torque wrench, nitrogen and regulator, vacuum pump, micron gauge and manifold gauges
Step 1: Confirm the size and plan the layout
Make sure each indoor head is sized for its room. Our mini split sizing guide covers BTU per square foot and the adjustments for climate, insulation and ceiling height. Then plan the layout:
- Indoor head: Mount it on an exterior wall if possible, high on the wall with the clearance from the ceiling and side walls listed in the manual. Keep it away from direct sun on the unit, heat sources and spots where airflow would blow straight onto a bed or sofa.
- Outdoor unit: Pick a spot with the required clearances for airflow and service, away from dryer vents and roof runoff. In snowy climates, raise it above typical snow depth on a stand or wall bracket.
- Line set route: Keep the run within the manufacturer's minimum and maximum line length and elevation limits. Longer runs may need additional refrigerant, which the technician will calculate from the manual.
Step 2: Mount the indoor bracket and drill the wall
- Locate studs and fasten the mounting plate level, using the template from the manual.
- Mark the wall penetration at the position the template shows (left, right or rear).
- Check for wiring, plumbing and framing behind the wall before drilling.
- Drill the hole with a slight downward slope toward the outside, so condensate and rain drain outward.
- Install a wall sleeve if supplied, to protect the lines and cable.
Step 3: Prepare the line set, cable and drain
The refrigerant lines, communication cable and condensate drain usually pass through the wall together, wrapped as one bundle.
- Line set: Bend copper gently by hand or with a bender, avoiding kinks. Keep the ends capped until connection so dirt and moisture stay out. Insulate both lines; the suction line in particular must be fully insulated to prevent condensation.
- Cable: Use the wire type and gauge specified by the manufacturer for the indoor-to-outdoor connection.
- Condensate drain: Keep the drain at the bottom of the bundle with a continuous downward slope and no sags or traps unless the manual calls for one. Where gravity drainage isn't possible, use a mini split condensate pump.
Feed the bundle through the wall, hang the indoor unit on its bracket, and confirm it is secure and level (or tilted slightly toward the drain side, if the manual says so).
Step 4: Set the outdoor unit
- Place a level pad or install a wall bracket rated for the unit's weight.
- Use anti-vibration feet or pads to reduce noise.
- Maintain the clearances listed in the manual on all sides.
- Secure the unit against wind, and in some areas against seismic movement, as required by code.
Step 5: Refrigerant connections, pressure test and vacuum (licensed tech)
This is the step that requires EPA 608 certification on a standard system. Here's what the technician does, so you know what to expect and can make sure it's done properly:
- Flare connections: Lines are cut square, deburred, and flared with a proper flaring tool. Each flare nut is tightened to the torque value in the manual with a torque wrench. Under- or over-tightened flares are a leading cause of mini split leaks.
- Pressure test: The lines and indoor coil are pressurized with dry nitrogen and checked for leaks, typically with a hold test.
- Vacuum: A vacuum pump removes air and moisture from the line set and indoor coil. The technician uses a micron gauge to confirm a deep vacuum (commonly 500 microns or lower) and a decay test to confirm it holds.
- Release the charge: The service valves on the outdoor unit are opened to release the factory refrigerant into the system.
- Charge adjustment: If the line set is longer than the pre-charged length, the technician adds refrigerant by weight, per the manual.
Many newer mini splits use A2L refrigerants such as R-454B or R-32, which are classified as mildly flammable. These have specific handling, ventilation and leak detection requirements, which is another reason this step belongs to a trained technician.
Pre-charged quick-connect systems skip the flaring, vacuum and charging. You thread the quick-connect fittings together and open the valves in the order the manufacturer specifies. Follow the instructions exactly, and don't cut or shorten a pre-charged line set.
Step 6: Electrical connections (to local code)
- Run a dedicated circuit sized from the outdoor unit's nameplate data, including the minimum circuit ampacity (MCA) and maximum overcurrent protection (MOP).
- Install a disconnect within sight of the outdoor unit, as required by the NEC.
- Connect the indoor-to-outdoor communication/power cable exactly as shown on the wiring diagram. Terminal numbers must match on both ends.
- Ground the equipment properly.
Turn the power off at the breaker before any wiring work. If you aren't qualified, hire a licensed electrician, and pull a permit where required.
Step 7: Start up and test
- Restore power and run the unit in cooling mode, then heating mode, using the manufacturer's test-run procedure if one is provided.
- Check that the indoor unit blows cold (and warm) air and the outdoor fan and compressor run normally.
- Pour water into the indoor unit's drain pan, or watch during operation, to confirm the condensate drains freely.
- Check every flare and connection for leaks once more.
- Seal the wall penetration, then install line set covers for a clean finish and UV protection.
Common mistakes to avoid
- Skipping the vacuum or using a vacuum without a micron gauge.
- Flaring without a torque wrench.
- Kinking the copper line set during bending.
- Letting the condensate drain sag or run uphill.
- Undersized wiring or a missing outdoor disconnect.
- Mounting the outdoor unit where it will be buried by snow or blocked by shrubs.
Should you DIY or hire a pro?
If you choose a pre-charged system, are comfortable drilling exterior walls, and have a licensed electrician handle the circuit, a DIY install can be realistic. With a standard system, a common middle ground is to do the prep yourself (mounting, drilling, running the line set and drain) and have an EPA 608-certified HVAC technician make the refrigerant connections, pressure test, vacuum and commission the system. Confirm with the contractor before you start, because some won't commission equipment they didn't install.
Shop our ductless mini splits, matching refrigerant line sets, and condensate pumps for installs where gravity drainage won't work. Questions about matching indoor and outdoor units? Contact our team with your model numbers.