
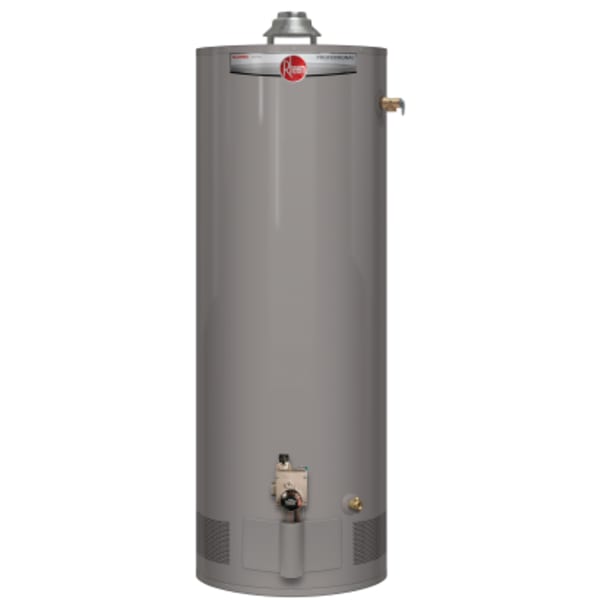
Every tank water heater collects sediment. Minerals in the water (mostly calcium and magnesium) settle to the bottom of the tank, along with sand and bits of a worn anode rod. Over time, that layer insulates the water from the gas burner, causes popping or rumbling noises, and can bury the lower element on an electric heater. Draining and flushing the tank once a year is one of the simplest maintenance jobs you can do to keep a water heater quiet, efficient and working longer.
This guide covers standard gas and electric tank water heaters. You'll need about an hour, a garden hose, and a few basic tools. Read the safety notes before you start, and always follow the instructions in your heater's manual if they differ from the general steps below.
When to flush (and when not to)
- Once a year is a good general schedule. Homes with hard water may benefit from flushing every six months.
- Signs you're overdue: popping, crackling or rumbling noises while the heater runs, hot water that runs out faster than it used to, or rusty or gritty water at the tap.
- Use caution on an old tank that has never been flushed. On a heater that's 10+ years old with heavy buildup, sediment can clog the drain valve, and a corroded tank may start leaking once the sediment that was sealing a weak spot is disturbed. If your heater is near the end of its life, it may make more sense to plan a replacement.
What you'll need
- A garden hose long enough to reach a floor drain, a laundry sink, or outside to a spot lower than the drain valve
- A flat-head screwdriver or pliers (some drain valves have a slotted stem instead of a handle)
- Work gloves and safety glasses
- A non-contact voltage tester (electric heaters)
Safety first
The water in the tank is hot enough to scald. Water heaters are often set to 120°F or higher, and the water in the tank can be hotter than what reaches your faucets. Either let the tank cool for several hours (or overnight) after shutting it off, or work very carefully, wear gloves, and make sure the hose is secured where the water discharges.
- Electric heaters: Turn the power off at the circuit breaker, not just at the thermostat. Electric water heaters typically run on 240 volts. Confirm the power is off with a voltage tester before you remove any access panels.
- Gas heaters: If you smell gas at any point, stop, leave the area, and call your gas utility from outside. Don't operate switches or create sparks.
- If you're not comfortable working with gas controls or 240-volt circuits, hire a licensed plumber.
Step 1: Turn off the gas or power
Gas water heater: Turn the gas control knob to Pilot or Off, as described on the label on your heater. Pilot keeps the pilot light lit while the main burner stays off, which makes restarting easier. If your heater has an electronic control or a power vent blower, also unplug it or switch off its power.
Electric water heater: Switch off the breaker that feeds the water heater. This step matters more than anything else in this guide, for reasons covered in Step 7.
Step 2: Shut off the cold water supply
Find the shut-off valve on the cold water inlet line, usually on the pipe that enters the top of the tank on the right side (often marked "cold"). Close it fully.
Step 3: Connect the hose and open a hot water faucet
- Thread a garden hose onto the drain valve near the bottom of the tank.
- Run the other end to a floor drain, a laundry sink, or outdoors. The end of the hose must be lower than the drain valve for the tank to drain by gravity.
- Open a hot water faucet somewhere in the house, ideally one on a floor above the heater. This lets air into the system so the tank drains freely instead of holding a vacuum.
Step 4: Drain the tank
Open the drain valve slowly. The water will be cloudy or discolored at first, and you may see sand-like particles. Draining a 40- or 50-gallon tank can take 20 minutes to an hour, depending on how much sediment is present and how freely the valve flows.
If the flow slows to a trickle while the tank is still full, sediment is probably clogging the valve. Closing the valve and opening it again, or briefly turning the cold supply on (Step 5), can help break up the clog. Don't force a stiff plastic drain valve, since many factory valves are plastic and can crack.
Step 5: Flush out the sediment
Once the tank is empty, or nearly empty:
- With the drain valve still open, open the cold water supply valve for a short burst of 30 seconds to a minute. The incoming water stirs up sediment on the bottom of the tank and pushes it out the drain.
- Close the cold supply and let the tank drain again.
- Repeat until the water coming out of the hose runs clear. This may take several cycles on a tank with heavy buildup.
Step 6: Close the drain and refill the tank
- Close the drain valve and remove the hose. Check the valve for drips.
- Leave the hot water faucet open.
- Open the cold water supply valve fully. The tank will begin to fill.
- Keep the hot faucet open until water flows from it in a steady stream with no sputtering air. A steady stream means the tank is full and the air is purged.
- Close the faucet. Open other hot water faucets briefly to clear air from those lines too.
Step 7: Restore power or gas, only after the tank is full
Electric heaters: never turn the power back on until the tank is completely full of water. Heating elements are designed to be submerged. If you restore power while the tank is empty or partly empty, an exposed element can "dry fire" and burn out within seconds. This is the most common way people ruin an element during a flush. Once a steady stream of water flows from a hot faucet, switch the breaker back on.
If you do burn out an element, replacement elements are available in our water heater elements and conversion kits collection. Match the voltage, wattage and mounting style printed on the old element.
Gas heaters: Turn the gas control from Pilot (or Off) back to On, and set the temperature to your normal setting. If the pilot went out, relight it following the lighting instructions on the heater's label. Plug the heater back in if it has a power vent or electronic control. Check around the drain valve and gas connections, and confirm the burner lights and the flame looks normal.
Recovery takes time: allow about an hour for the tank to reheat fully before you expect normal hot water.
A caution about the T&P relief valve
The temperature and pressure (T&P) relief valve is the safety valve on the top or upper side of the tank, with a discharge pipe running toward the floor. It opens if the tank's temperature or pressure gets dangerously high. It's one of the most important safety devices in your home.
- Some guides tell you to open the T&P valve to let air in while draining. Opening a hot faucet does the same job and is safer. On an older valve, lifting the lever can leave it unable to reseat, so it keeps dripping afterward.
- If you test the valve, as many manufacturers recommend doing periodically, stand clear of the discharge pipe. Water released from it is scalding hot. Make sure the discharge pipe is in place and runs to a safe location.
- If the valve drips or leaks after testing, or if it's discharging on its own, replace it. Frequent discharge can also point to excess pressure in the system, such as a missing or failed thermal expansion tank, which a plumber should check.
- Never cap, plug or remove the T&P valve or its discharge pipe. A replacement must match the tank's ratings. Browse relief valves and check the BTU/h and pressure ratings on your heater's label before ordering.
Other checks while you're there
- Anode rod: The anode rod protects the steel tank from corrosion by corroding first. Many manufacturers suggest checking it every few years. If it's worn down to the core wire, replacing it can extend the tank's life. See our dip tubes and anode rods.
- Leaks and corrosion: Look for rust at the fittings and moisture around the base. Water leaking from the tank itself, rather than from a fitting or valve, usually means the tank needs replacing.
When it's time to replace
If your tank leaks, still rumbles after a thorough flush, or is past its expected service life, a replacement may be the better investment. Browse our residential gas tank water heaters to compare options. If you need help choosing a replacement or finding a part, send us the model and serial number from your heater's label and we'll help you find the right match.