
A toilet that keeps running, or refills on its own every few minutes with no one using it, is one of the most common plumbing problems in any home. It's also one of the most wasteful. A steady leak from the tank into the bowl can send a surprising amount of water down the drain every day, and you pay for every gallon. The good news: almost every running toilet comes down to a handful of inexpensive parts inside the tank, and most fixes take less than an hour with basic tools.
This guide shows you how to find the cause, then walks through each fix step by step, from the easiest (a chain adjustment) to the most involved (replacing the flush valve).
How a toilet tank works
Lift the tank lid and you'll see two main assemblies:
- The flush valve sits in the center of the tank bottom. It includes the flapper (a rubber seal), the valve seat it closes against, and the overflow tube, the open vertical pipe that sends excess water into the bowl so the tank can't overflow onto the floor.
- The fill valve is the tall assembly on the left side, connected to the water supply line under the tank. It refills the tank after each flush and shuts off when a float rises to the set water level. A thin refill tube runs from the fill valve to the overflow tube to top up the water in the bowl.
When you press the handle, a chain lifts the flapper, water rushes into the bowl, and the flapper drops back onto the seat. The fill valve then refills the tank until the float tells it to stop. A running toilet means one of these two things isn't happening the way it should: either water is leaking past the flapper, or the fill valve isn't shutting off.
Step 1: Find the cause
Before you buy any parts, spend five minutes figuring out which side of the tank is the problem.
Check the water level
Take the lid off and look at the overflow tube. If water is spilling into the top of the overflow tube, the fill valve is set too high or isn't shutting off. The water should stop about 1 inch below the top of the overflow tube, or at the water line mark printed inside many tanks.
Do the dye test
If the water level is below the overflow tube but the toilet still refills on its own (sometimes called "phantom flushing"), water is leaking from the tank into the bowl, usually past the flapper.
- Add a few drops of food coloring or a toilet dye tablet to the tank water.
- Don't flush. Wait 15 to 30 minutes.
- If colored water shows up in the bowl, the flapper or the flush valve seat is leaking.
Step 2: Adjust the flapper chain
This is the easiest fix, so check it first.
- Chain too short: The flapper can't close all the way, so water keeps running.
- Chain too long: Extra chain can get trapped under the flapper and hold it open, or the flapper may not lift far enough for a full flush.
Unhook the chain from the flush lever and reattach it so there's about 1/2 inch of slack when the flapper is closed. Trim any long tail of excess chain, or clip it back on itself, so it can't fall under the flapper. Flush a few times and watch the flapper drop and seal.
While you're there, check the handle. If it sticks in the down position, tighten the nut inside the tank that holds it. Note that this nut is usually reverse-threaded, so you turn it counterclockwise to tighten. Replace the handle if it's worn or corroded.
Step 3: Replace a worn flapper
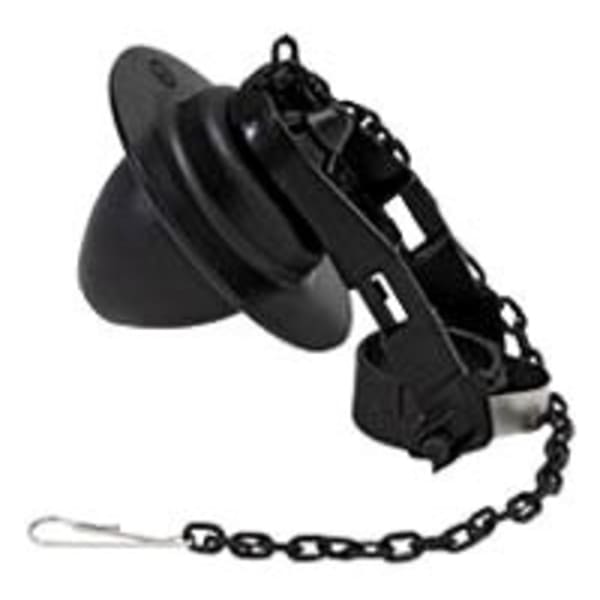
If the dye test showed a leak, the flapper is the most likely culprit. Rubber flappers harden, warp and pick up mineral deposits over time, especially in homes with hard water or where in-tank bleach cleaning tablets are used.
- Shut off the water at the supply valve behind the toilet (turn it clockwise).
- Flush and hold the handle down to drain the tank as far as possible.
- Unhook the chain from the flush lever.
- Remove the old flapper. Most flappers have two side ears that slip off pegs on the overflow tube. Others use a ring that slides over the overflow tube.
- Clean the valve seat. Wipe the rim the flapper closes against with a rag. If it feels rough, gently scrub off mineral buildup with a non-scratch pad. A pitted or cracked seat will keep leaking even with a new flapper.
- Install the new flapper, attach the chain with about 1/2 inch of slack, and turn the water back on.
- Repeat the dye test to confirm the leak has stopped.
Match the size. Most toilets use a 2-inch flapper, but many newer high-efficiency toilets use a 3-inch or larger flush valve. Measure the drain opening, or check the toilet brand and model (usually stamped inside the tank behind the water line). A universal option like the Fluidmaster PRO54 universal fit flapper fits many 2-inch flush valves. Some brands, including several TOTO, Kohler and American Standard models, use proprietary flappers or canister-style flush valves, so a brand-specific part is often the better choice.
Step 4: Adjust or fix the fill valve
If water is running into the overflow tube, the fill valve needs attention.
Lower the water level
- Float cup fill valves (the most common modern type, with a cylindrical float that rides up and down the valve body): turn the adjustment screw or rod on top, or squeeze the clip on the float rod and slide the float down.
- Older ballcock valves with a floating ball on an arm: turn the adjustment screw on top of the valve, or gently bend the float arm down slightly so the ball shuts the water off sooner.
Flush and check that the tank fills to about 1 inch below the top of the overflow tube.
Check the refill tube
The refill tube should clip to the top of the overflow tube and stay above the water line. If the tube is pushed down into the overflow tube below the water level, it can siphon water out of the tank and keep the fill valve running. Clip it in place on the rim of the overflow tube.
Clean or replace the fill valve
Debris and mineral scale can keep the valve from sealing. Many fill valves have a removable cap so you can flush out grit. Shut off the water, remove the cap per the manufacturer's instructions, hold a cup over the valve, and briefly turn the water on to flush it out. If the valve still won't shut off, is cracked or is more than about ten years old, replacement is usually the better fix. See our step-by-step guide: how to replace a toilet fill valve.
Step 5: Replace the flush valve (if the seat is damaged)
If a new flapper still leaks, the flush valve seat may be cracked, pitted or warped. Some flush valves also have a gasket that can fail where the valve meets the tank. Replacing the flush valve is a bigger job: on most two-piece toilets you have to remove the tank from the bowl, replace the flush valve and the tank-to-bowl gasket, and reinstall the tank with new bolts and washers.
It's doable for a confident DIYer, but take your time:
- Shut off and disconnect the water supply, and drain and sponge out the tank.
- Tighten tank bolts evenly and gradually, alternating sides. Over-tightening can crack the porcelain.
- Check for leaks at the bolts, gasket and supply line after refilling.
Browse replacement assemblies in our toilet flush valves collection, and match the valve size (2-inch, 3-inch or larger) and your toilet brand.
Safety and practical tips
- Always shut off the water at the supply valve before you remove parts. If the valve won't turn or leaks, don't force it. Shut off the main and consider replacing the supply stop.
- Handle porcelain with care. Tank lids are heavy and break easily. Set the lid on a towel on the floor, not on the toilet seat.
- Avoid harsh in-tank cleaners. Bleach and chlorine tablets can wear out rubber parts faster.
- Wear gloves and wash your hands after working in the tank.
- Call a licensed plumber if you find a leak at the base of the toilet, a cracked tank or bowl, a corroded supply valve, or water damage on the floor or ceiling below.
Quick troubleshooting chart
| Symptom | Likely cause | Fix |
|---|---|---|
| Water flowing into the overflow tube | Fill valve set too high or not shutting off | Lower the float; clean or replace the fill valve |
| Toilet refills on its own every few minutes | Flapper leaking | Replace the flapper; clean the seat |
| Runs until you jiggle the handle | Chain too short or tangled; sticking handle | Adjust the chain; tighten or replace the handle |
| New flapper still leaks | Damaged flush valve seat | Replace the flush valve |
| Constant hiss, slow refill | Debris or worn seal in the fill valve | Flush out debris or replace the fill valve |
Need parts? Shop fill valves, flappers, handles and more in our toilet fill valves, flappers and repair parts collection. If you're not sure which part fits your toilet, send us the brand and model number from inside the tank and we'll help you find the right one.